How to setup a heat bulb and thermostat!
On our care sheets, we mention thermostats and guards a lot because these are a vital piece of equipment when keeping snakes. They control the temperature of the heating source so it cannot reach deadly temperatures and the guard prevents your snake from getting too close to the heat bulb and getting burnt.
For this How to, the pictures will show you a step by step guide on how to setup your bulb to your dimmer thermostat and how to fit a guard.
Remember to check your thermostat can cope with the wattage of the heat bulb.
For this How to, the pictures will show you a step by step guide on how to setup your bulb to your dimmer thermostat and how to fit a guard.
Remember to check your thermostat can cope with the wattage of the heat bulb.
If you are unsure of where to get these products we would recommend Surrey Pet Supplies they are who we use for our reptile products and they offer a great service. They also stock a good range of light fittings, heat bulbs, guards and thermostats. You can find digital thermometers on eBay for a couple of pound.
Click on the pictures below to enlarge them.
Step 1
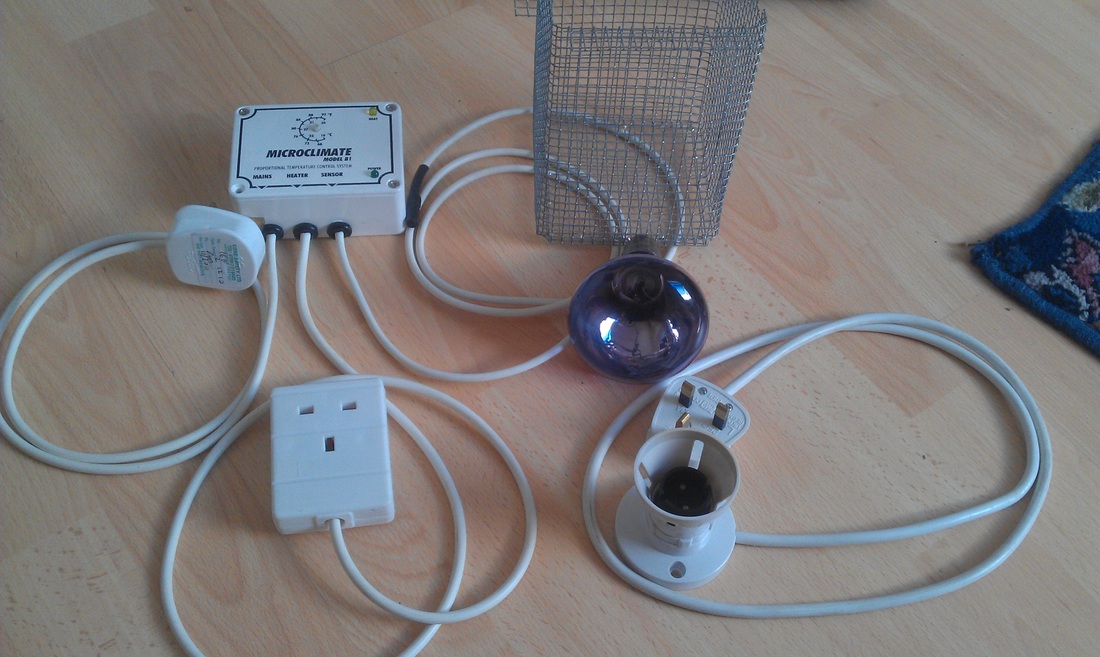
You are going to need a dimmer thermostat, light guard, light fitting and heat bulb.
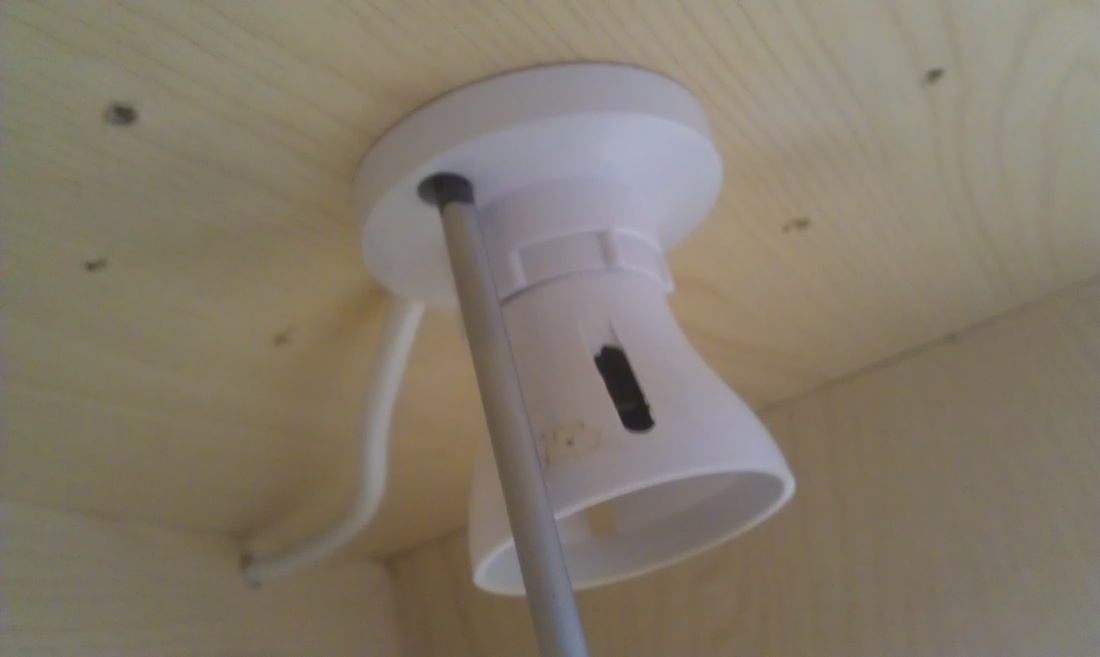
Step 2

This is your heat bulb and light fitting. The next step is to attach the light fitting to your vivarium ceiling.
Step 3
You will need to drill a hole for your light fitting cable to come through into the vivarium (shown in the pictures above the vent). You will need to screw the light fitting to the ceiling of your vivarium, holes do not need to be drilled in advanced. Place the heat bulb into the fitting but do not plug the fitting in to the thermostat.
|

|
|
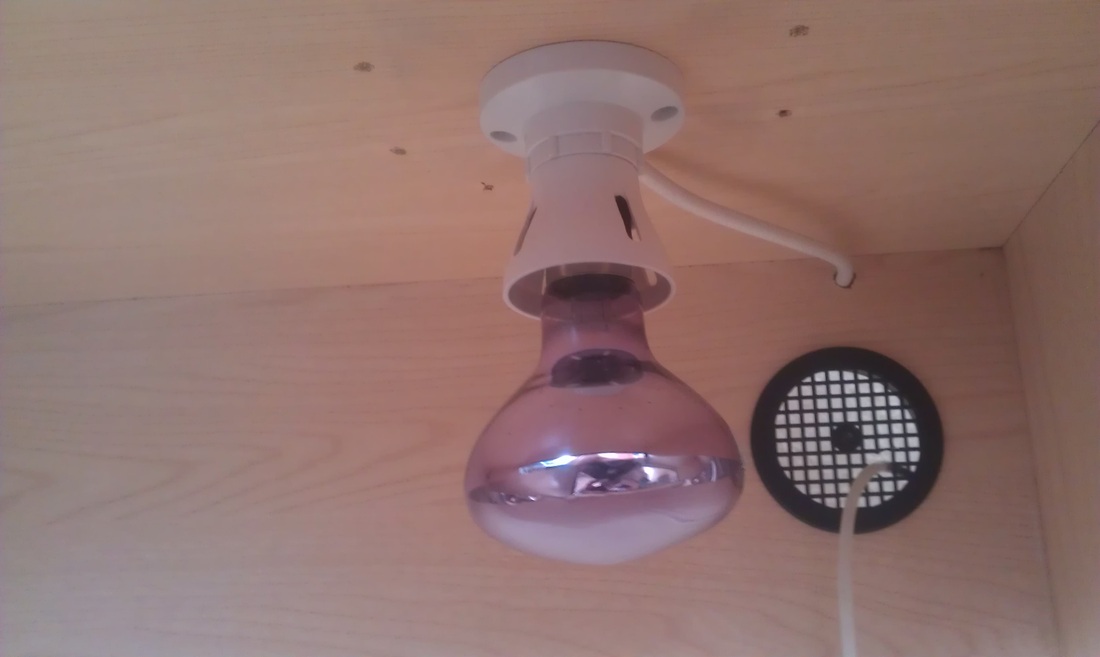
Step 4
Now you need to attatch your bulb guard. You may need to cut a small hole into the wire mesh for your light fitting cable to go through. Add two screws to each side of the guard making sure the screws are wide enough to hold the guard in place. Once finished your bulb, bulb fitting and guard should look something like the third picture.
(remember to try and keep the bulb in the centre of the guard so that there is an even gap around the bulb)
(remember to try and keep the bulb in the centre of the guard so that there is an even gap around the bulb)

|

|

|
Step 5
Next you will need your dimming thermostat, there is three leads that come off your thermostat, one is the plug, another is the plug socket for your heat source and lastly there is the probe. Plug your light fitting plug in to the thermostat but do not plug your thermostat in to the mains yet.

|

|
Step 6
Now put the thermostat probe through the vent or you can drill a hole through the vivarium if you wish. We place the probe on the hotspot and secure it using nail cable clips/u-clips, if you have a branch under the heat bulb and guard you would place the probe there and secure it to the branch using a cable tie. Never use any form of tape within the vivarium!
Now plug your thermostat in and set your required temperature on the thermostat dial. Now leave your thermostat for 24 hours to settle and then change the dial accordingly but do not add your snake until the temperatures have been running consistently for at least 24 hours. Its best to check and monitor temperatures using a digital thermometer.
Now plug your thermostat in and set your required temperature on the thermostat dial. Now leave your thermostat for 24 hours to settle and then change the dial accordingly but do not add your snake until the temperatures have been running consistently for at least 24 hours. Its best to check and monitor temperatures using a digital thermometer.

|

|

|
